博客NexT主题美化设置
在网站根目录下输入以下命令
git clone https://github.com/theme-next/hexo-theme-next themes/next |
这样在当前目录下的themes文件夹中就有了Next主题
我们将站点根目录下的
_config.yml文件称为站点配置文件, 将themes/next文件夹内的_config.yml文件称为主题配置文件 。
1、启用主题
打开站点配置文件 ,找到 theme ,建议用 ctrl+f 搜索theme 快速定位,修改为
# Extensions |
2、选择主题风格
打开 主题配置文件 ,找到 Scheme Settings ,Next主题提供四种风格,分别为 Muse , Mist , Pisces , Gemini , 使用时只需将想启用的风格前面的 # 删除即可,我使用的是 Gemini 风格的
# --------------------------------------------------------------- |
3、菜单设置
菜单包括:首页、归档、分类、标签、关于等等
刚开始的时候默认只有首页和归档两个,可以根据需要添加相应的菜单,打开 主题配置文件 ,找到 Menu Settings , 一下为我的设置
# --------------------------------------------------------------- |
添加分类模块
新建一个分类页面
hexo new page categories
将
source/categories/index.md文件中的type修改为type: "categories"在菜单设置中将
categories取消注释打开
scaffolds/post.md文件,在后面增加categories:之后的每一篇文章会自动创建
categories:,后面输入分类名即可
添加标签模块
新建一个分类页面
hexo new page tags
将
source/tags/index.md文件中的type修改为type: "tags"在菜单设置中将
tags取消注释打开
scaffolds/post.md文件,在后面增加tags:之后的每一篇文章会自动创建
tags:,后面输入标签名即可,多个标签按如下格式输入tags:
- 标签1
- 标签2
...
添加关于模块
新建一个分类页面
hexo new page about
修改
source/about/index.md文件的内容为关于的内容即可在菜单设置中将
about取消注释
添加搜索模块
安装
hexo-generator-searchdb插件npm install hexo-generator-searchdb --save
打开
站点配置文件,在最后添加search:
path: search.xml
field: post
format: html
limit: 10000打开
主题配置文件, 找到local_search,将enable修改为true# Local search
# Dependencies: https://github.com/theme-next/hexo-generator-searchdb
local_search:
enable: true
修改个人社交信息
在
主题配置文件中搜索social,选择想展示的社交信息,如下social:
GitHub: https://github.com/ShangguanHong || github
E-Mail: mailto:sgh1450280694@gmail.com || envelope
Weibo: https://weibo.com/5590338381 || weibo
#Google: https://plus.google.com/yourname || google
#Twitter: https://twitter.com/yourname || twitter
4、网站动画效果
使用canvas_nest
在
theme/next目录下执行git clone https://github.com/theme-next/theme-next-canvas-nest source/lib/canvas-nest命令,将主题配置文件中的canvas_nest: false改为canvas_nest: true使用three_waves
在
theme/next目录下执行git clone https://github.com/theme-next/theme-next-three source/lib/three_waves命令,将主题配置文件中的three_waves: false改为three_waves: true使用canvas_lines
将
主题配置文件中的canvas_lines: false改为canvas_lines: true使用canvas_sphere
将
主题配置文件中的canvas_sphere: false改为canvas_sphere: true
5、文章字数统计与阅读时间
在网站根目录下运行命令
npm install hexo-symbols-count-time --save
修改
站点配置文件,添加以下代码symbols_count_time:
symbols: true
time: true
total_symbols: true
total_time: true修改
主题配置文件,找到symbols_count_time# Post wordcount display settings
# Dependencies: https://github.com/theme-next/hexo-symbols-count-time
symbols_count_time:
separated_meta: true
item_text_post: true
item_text_total: false
awl: 4
wpm: 275
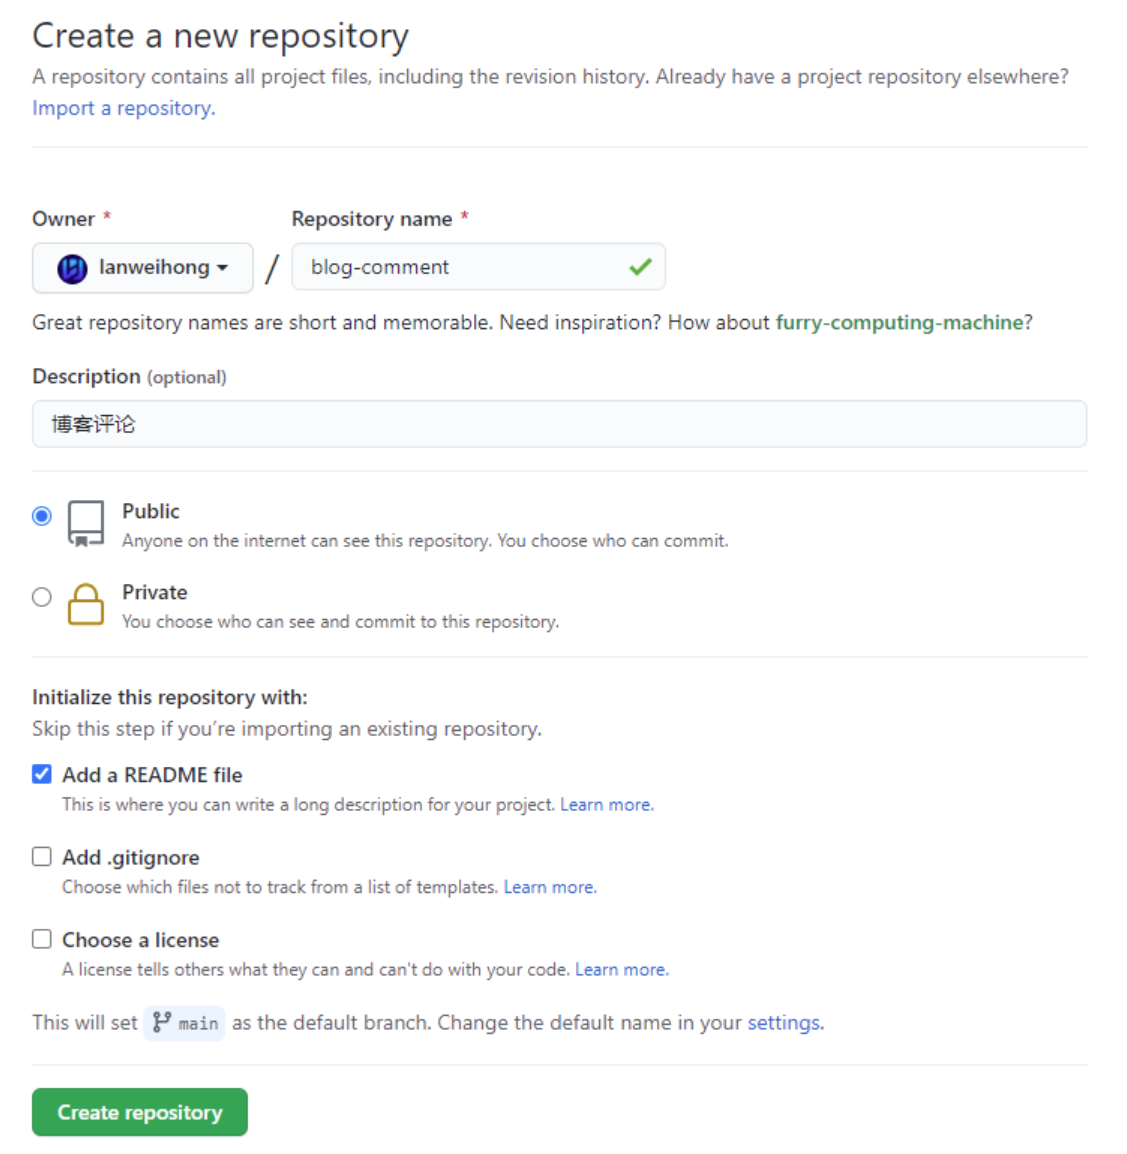
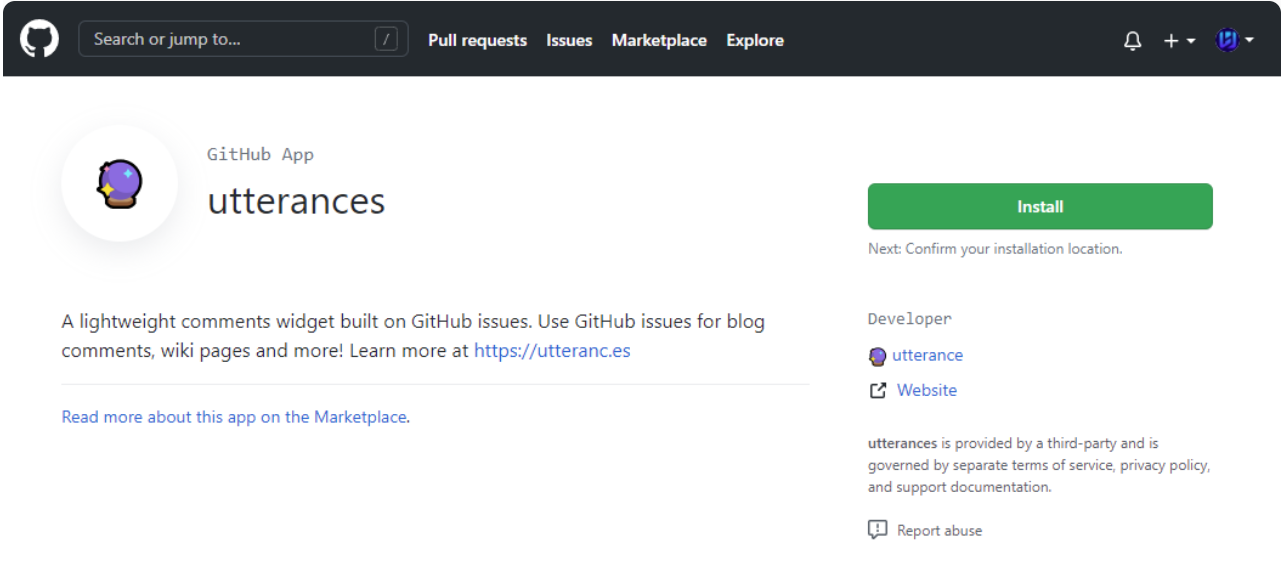
6、安装博客评论功能utterances
对于github上来说,先创建一个公共的库
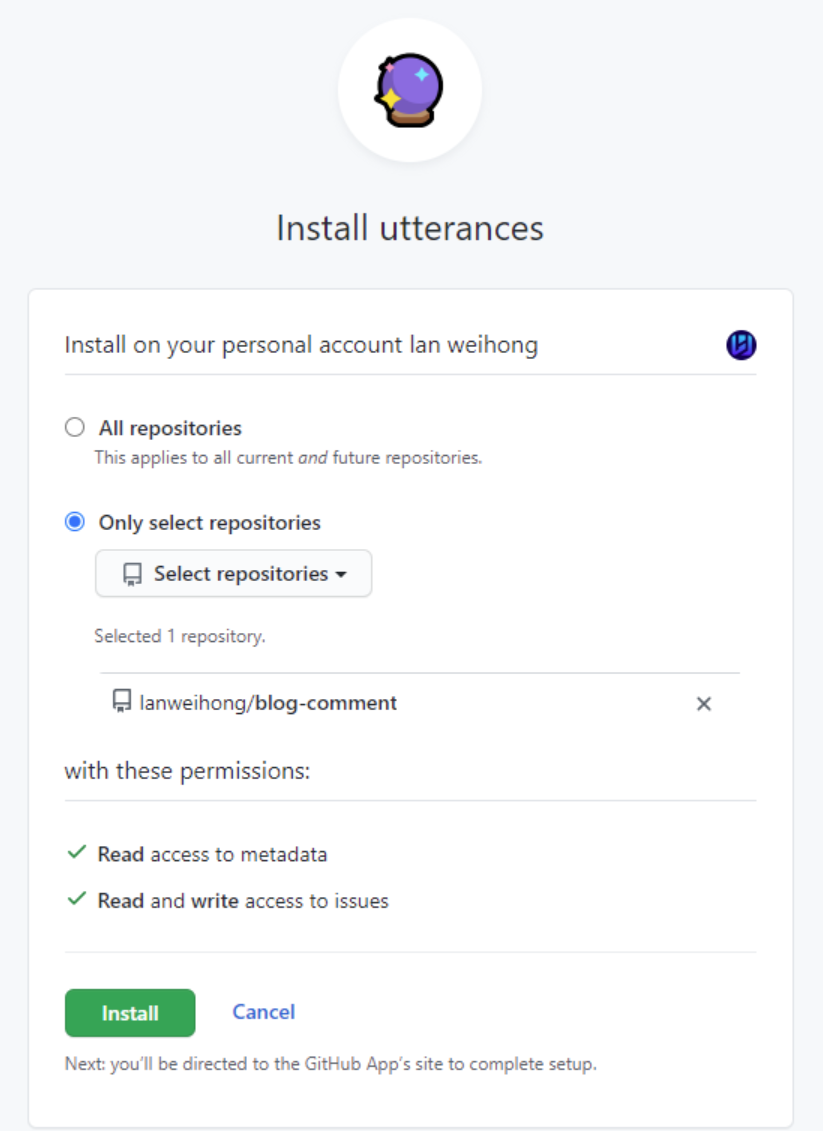
然后安装GitHub App utterances(https://github.com/apps/utterances)
选择关联的仓库,我们选择刚刚建好的仓库;
在主题配置中
# Utterances |
在站点配置中
# URL |
在其他页面也有评论框怎么办,在该页面下添加comments: false

7、代码块的设置
在next主题下的设置文件中_config.yml,进行代码块的设置
codeblock: |
其他微调在网页内自己调,然后在vscode中搜索更改,一点一点摸索

8、添加图片放大预览功能
利用 Fancybox 能放大查看图片。
有 Fancybox2 和 Fancybox3 两个版本,这里使用 Fancybox3。
如果已经有 fancybox2 的,需要在站点根目录下执行下列命令进行删除:
rm -rf themes/next/source/lib/fancybox |
进入到 themes/next 主题目录下,执行以下命令安装 fancybox3 模块:
cd themes/next |
编辑 主题配置文件,启用 fancybox,修改配置如下:
fancybox: true |
9、设置侧栏阅读进度百分比
编辑 站点配置文件,修改 back2top 部分如下:
back2top: |
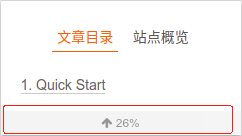
10、设置顶部阅读进度条
进入到 NexT 主题目录下:
cd themes/next |
安装模块到 source/lib 目录下:
git clone https://github.com/theme-next/theme-next-reading-progress source/lib/reading_progress |
编辑 主题配置文件,启用 reading_progress 模块,如下:
注意:不是vendors:下的reading_progress
# Reading progress bar |
11、设置左上角或右上角 github 图标
开启默认设置
NexT 支持通过配置开启右上角 github 图标,编辑 主题配置文件,启用 github-banner 如下:
# `Follow me on GitHub` banner in the top-right corner. |
效果如下:
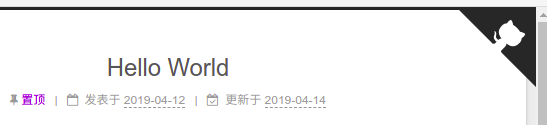
进阶自定义设置
自定义配置使其可以使用 GitHub Ribbons 和 GitHub Corners 中的任何一款图标。
修改 /themes/next/layout/_partials/github-banners.swig 文件内容如下:
同时编辑 站点配置文件,修改 github_banner 部分如下:
# `Follow me on GitHub` banner in the top-left or top-right corner. |
这样你就可以通过 type 随意切换 banner 的样式了。
12、解决文章目录自带编号问题
首先打开配置文件
找到博客根目录,右键打开菜单,点击“Git Bash Here”,博主博客路径为“/e/hexo/Blog”,输入以下命令,注意“next”为博主使用的主题名称,请根据自己的主题修改,可在“themes”目录下查看。
$ vim themes/next/_config.yml |
修改配置文件
找到“toc”功能
toc: |
执行以下命令
$ hexo clean && hexo g && hexo s |
“hexo clean”清除缓存文件
“hexo g” 是 “hexo generate” 的缩写,生成静态文件
“hexo s” 是 “hexo server” 的缩写,启动本地服务,用于预览主题
13、关闭自带动画,提升效率
在next主题下搜索motion,将其改为false即可
# Animation Settings |